
The moment a sweep peak touches 0 dBFS, the head of the IR crushes and RT60 falls apart. Choke it down too far, though, and the tail sinks into the noise floor and the value reads long instead. The window is narrower than you’d think.
The short answer
Put your measurement peak at -6 to -12 dBFS. The top is headroom so clipping doesn’t break the IR; the bottom keeps you well clear of the noise floor. Hold that, and the RT60 and frequency response that follow come out clean. When SNR feels short, don’t turn up the volume. Make the sweep longer.
Why you don’t crowd 0 dBFS
dBFS is a scale with the digital ceiling set at 0. 0 dBFS is full scale, and any waveform past it can’t be recorded, so its top flattens off. That’s clipping. A flattened waveform wrecks the head of the IR, the Schroeder decay curve lies down, and RT60 reads longer than it really is. Most cases of a wildly long RT60 come down to exactly this.
The tricky part is that the average level can look low while a single instantaneous peak alone touches 0. The thump when you power on the playback gear, a chair creak, an unexpected noise. One of these one-off transients jumps above the sweep peak and clips. Putting the peak at -6 to -12 dBFS also reserves headroom for that unexpected jump from the start.
Too low hurts too
So is lower always safer? Not quite. The further you drop the level, the closer the signal you want gets to the mic’s own noise floor. A phone’s built-in mic floor sits, depending on the device, roughly around -70 to -80 dBFS, and if you choke the peak down to -30 dBFS, the weak part of the tail dips under that floor and the decay curve flattens partway. The lower the frequency, the more the RT60 suffers.
The -6 to -12 dBFS band is the spot that keeps distance from both walls: clipping above and the noise floor below.
| Peak | What happens |
|---|---|
| Near 0 dBFS | Clipping. The head of the IR crushes and RT60 falls apart |
| -6 to -12 dBFS | The target. Headroom and SNR both satisfied |
| Below -30 dBFS | The tail nears the noise floor (recoverable with length) |
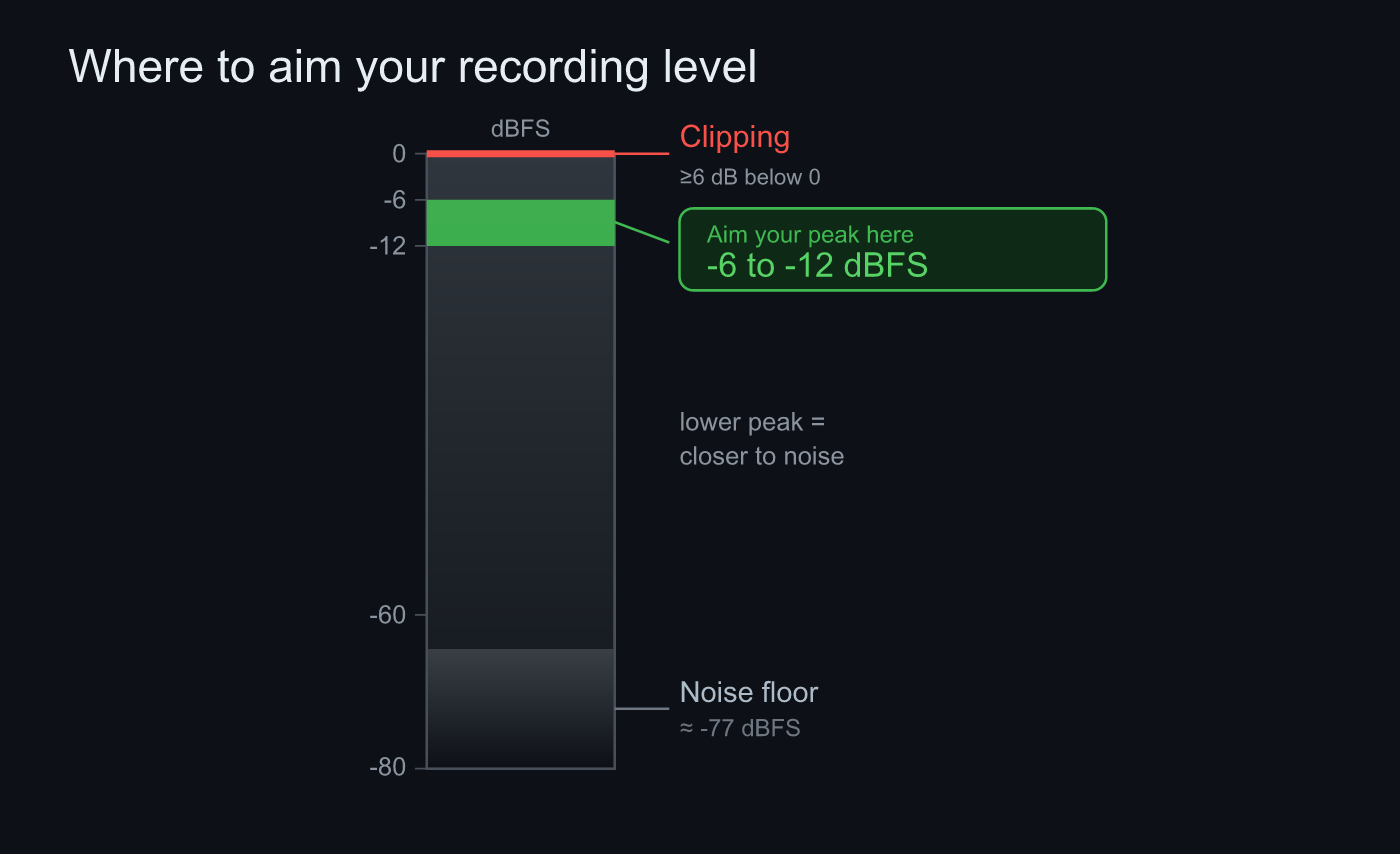 Clip at 0, noise floor below. Put the peak in the -6 to -12 dBFS band. Gain the S/N you’re missing from sweep length, not volume
Gain SNR from sweep length, not volume
This is the counter-intuitive part. If you want SNR, turn up the volume, goes the thought, and you keep nudging the level toward 0. But what’s up there is the clipping wall. Sweep measurement has a second axis: the length of the signal.
A log sweep plays the same signal spread out over time, then convolves the recording with an inverse filter to fold it back into an IR. Because the energy is spread across time, it rises out of the noise after correlation. As a rule of thumb, doubling the length buys about +3 dB of S/N. So you keep the level fixed at -6 to -12 dBFS and stretch SNR along a separate axis. Long at the right level beats short and loud. That’s the recording that doesn’t fall apart.
As an aside, this ability to treat level and SNR separately is unique to the sweep. With a single clap, the energy is packed into one instant, so the two collide at the single point of clipping.
Steps
Sonir locks the correction gain at record start and holds it constant across the whole take. It turns AGC (automatic gain) off reliably per device. So a level you set once won’t move on its own mid-recording.
- Turn AGC off and lock the gain: Sonir stops AGC automatically and locks the start gain for the whole take. First, make sure that’s in effect.
- Play the sweep and watch the level meter: play the sweep for real and check the input peak. A few seconds of test recording is plenty.
- Set the peak to -6 to -12 dBFS: on the playback side or by mic position, adjust the volume until the peak sits in that band. If it pins at the top, turn it down.
- Make the sweep longer if it’s short: don’t turn up the volume when SNR falls short. Lengthen the sweep and gain it from correlation.
- Confirm with the clip warning and decay curve: Sonir tells a one-off transient (a power-on thump and the like) apart from sustained clipping, so if no warning fires, move on to the real measurement. A straight decay curve means it worked.
FAQ
Should I set it right at 0 dBFS?
Avoid it. 0 dBFS is full scale, and the instant you touch it the signal clips. Even when the average looks low, a single instantaneous peak can jump in, so leave -6 to -12 dBFS of headroom.
What happens if the level is too low?
The weak part of the signal approaches the mic’s own noise floor (roughly -70 to -80 dBFS), the tail of the IR sinks in, and the decay curve flattens partway. The low-frequency RT60 in particular tends to read long.
Can’t I just turn up the volume to gain SNR?
You can, but the ceiling you hit is clipping. In sweep measurement you keep the level fixed at -6 to -12 dBFS and gain SNR separately from the sweep length. Doubling the length buys about +3 dB.
Is -6 to -12 dBFS fine for air recording (music) too?
Yes, the idea of leaving peak headroom is the same. Instantaneous peaks in music are hard to read, so set it a touch lower to keep the loudest spot from crossing -6 dBFS.
Related articles
- Measuring room acoustics with a smartphone: a full guide: the parent guide. The full picture of what sweep → IR can measure
- How to measure RT60 with a smartphone: the whole measurement flow, level and SNR included
- Why does RT60 read abnormally long?: the mechanism by which clipping breaks the decay curve
- Sweep vs clap: which IR measurement is more accurate?: more on gaining SNR from sweep length
Measure it in Sonir
Sonir is an app that completes acoustic measurement and comparison on your smartphone. The level-setting in this article too: just watch the level meter and clip warning and drive the peak into -6 to -12 dBFS. Everything is free, including the per-band deep dives.
Download on the App Store. Android coming soon. See the features page.